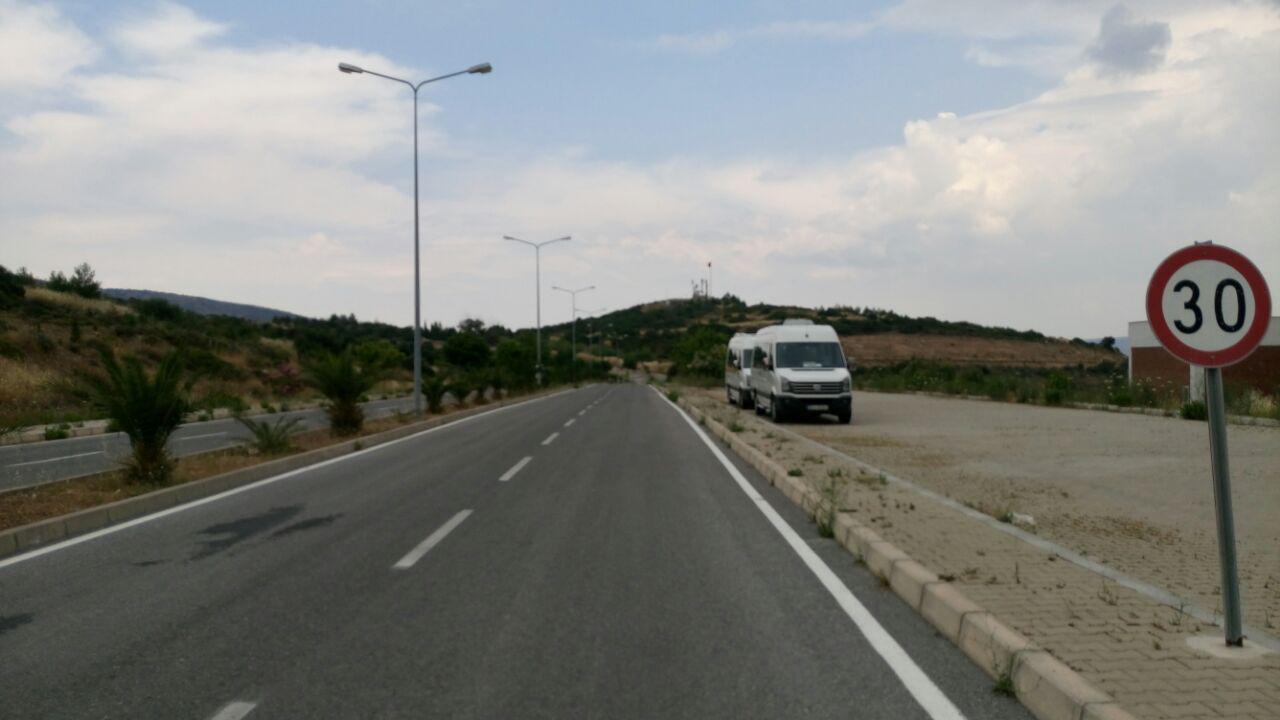
Welcome to my first programming series named Speedy. TSLSR stands for “Traffic Speed Limit Sign Recognizer”. I think you all now understood the purpose of the project. In first part of the project, we will filter the traffic sign and detect the digits.
Let’s start coding. First I created tslsr module and wrote a function named tslsr
###
# /tslsr/tslsr.py
###

def tslsr(image):
    """
        Takes an image then returns (mask, circles, rois for each circle)
    """
    image_hsv = cv2.cvtColor(cv2.GaussianBlur(image, (7, 7), 0), cv2.COLOR_BGR2HSV)
    mask = __filterRedColor(image_hsv)
    circles = __findCircles(mask)
    rois = []
    if circles is not None:
        circles = np.round(circles[0, :]).astype("int")
        for (x, y, r) in circles:
            rois.append(__extract_sign_roi(image, (x, y, r)))

    return (mask, circles, rois)
As you can see in code block, I am converting the color scheme into HSV to detect red color easily. I will explain the contents of __filterRedColor and __findCircles functions later in this article. But currently please focus on this function, After the converting process, I extracted a mask for red circle in the image.
After all of these operations, we will get roi(region of interest)s for the traffic sign. You can see the result of this process below.
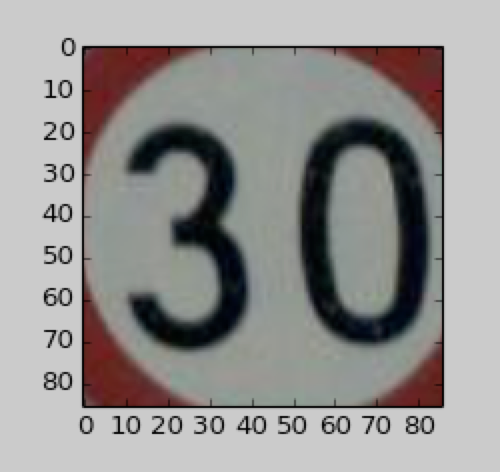
Yep we got it!! Now we can look the background of it.
###
# /tslsr/tslsr.py
###

def __filterRedColor(image_hsv):
    """
        Filters the red color from image_hsv and returns mask.
    """
    mask1 = cv2.inRange(image_hsv, np.array([0, 100, 65]), np.array([10, 255, 255]))
    mask2 = cv2.inRange(image_hsv, np.array([155, 100, 70]), np.array([179, 255, 255]))
    mask = mask1 + mask2
    mask = cv2.morphologyEx(mask, cv2.MORPH_OPEN, cv2.getStructuringElement(cv2.MORPH_ELLIPSE,(2,2)))
    mask = cv2.Canny(mask, 50, 100)
    mask = cv2.GaussianBlur(mask, (13, 13), 0)
    return mask

def __findCircles(mask):
    """
        Finds circles from mask and returns HoughCircles
    """
    circles = cv2.HoughCircles(mask, cv2.HOUGH_GRADIENT, 1, 100, param1=30, param2=50)
    return circles

def __extract_sign_roi(image, circle):
    """
        @circle => (x, y, r)
        Extracts roi from image and returns the roi
    """
    x, y, r = circle
    rn = r - 5
    rect = [(x - rn), (y - rn), (x + rn), (y + rn)]
    return image[rect[1]:rect[3], rect[0]:rect[2]]
You can find the contents of the important functions above. To get smooth red circle mask, we need to apply thresholding and blurring to the image_hsv. After this operations we can detect the circles in this mask clearly with __findCircles
function. As you can see, I am using HoughCircles to find circles in the mask. According to these circles, I am extracting the roi from image itself.
Let’s start the next critical portion of this article. We will find contours in this roi and we will create a bounding rectangle for it. For this part of the application, I wrote simple script, I will improve my approach later in part2.
###
# /main.py
###

mask, circles, rois = tslsr.tslsr(image)

plt.figure(1)
plt.subplot(221)
roi = cv2.cvtColor(rois[0], cv2.COLOR_BGR2RGB)
plt.imshow(roi.copy())

plt.subplot(222)
roi_hsv = cv2.cvtColor(roi, cv2.COLOR_RGB2HSV)

mask1 = cv2.inRange(roi_hsv, np.array([0, 0, 0]), np.array([180, 255, 50]))
mask1 = cv2.morphologyEx(mask1, cv2.MORPH_CLOSE, cv2.getStructuringElement(cv2.MORPH_ELLIPSE, (3, 3)))
mask1 = cv2.GaussianBlur(mask1, (5, 5), 0)
mask1 = cv2.Canny(mask1, 100, 200)
mask1 = cv2.morphologyEx(mask1, cv2.MORPH_CLOSE, cv2.getStructuringElement(cv2.MORPH_RECT, (3, 3)))
plt.imshow(mask1, cmap="gray")

im2, cnts, hierarchy = cv2.findContours(mask1.copy(), cv2.RETR_LIST, cv2.CHAIN_APPROX_SIMPLE)
cnts = sorted(cnts, key = cv2.contourArea, reverse = True)[:5]

for c in cnts:
    peri = cv2.arcLength(c, True)
    approx = cv2.approxPolyDP(c, 0.02 * peri, True)
    x, y, w, h = cv2.boundingRect(approx)
    print("ApproxLen:", len(approx), "rect:", (x,y,w,h))
    # cv2.drawContours(roi, [approx], -1, (0, 255, 0), 1)
    if h > 15:
        cv2.rectangle(roi, (x, y), (x+w, y+h), (0, 255, 0), 1);

plt.subplot(223)
plt.imshow(roi)

plt.show()
After I get the roi from tslsr function, I did some image processing on it. Just like the detection of red color, in this case we need to detect black color. I created a mask for black color. After creation of the mask, I need to find contours. For this purpose, I used findContours function of OpenCV. Then, with the help of boundingRect function, I drew a rectangle around the digits. You can see the result in below.
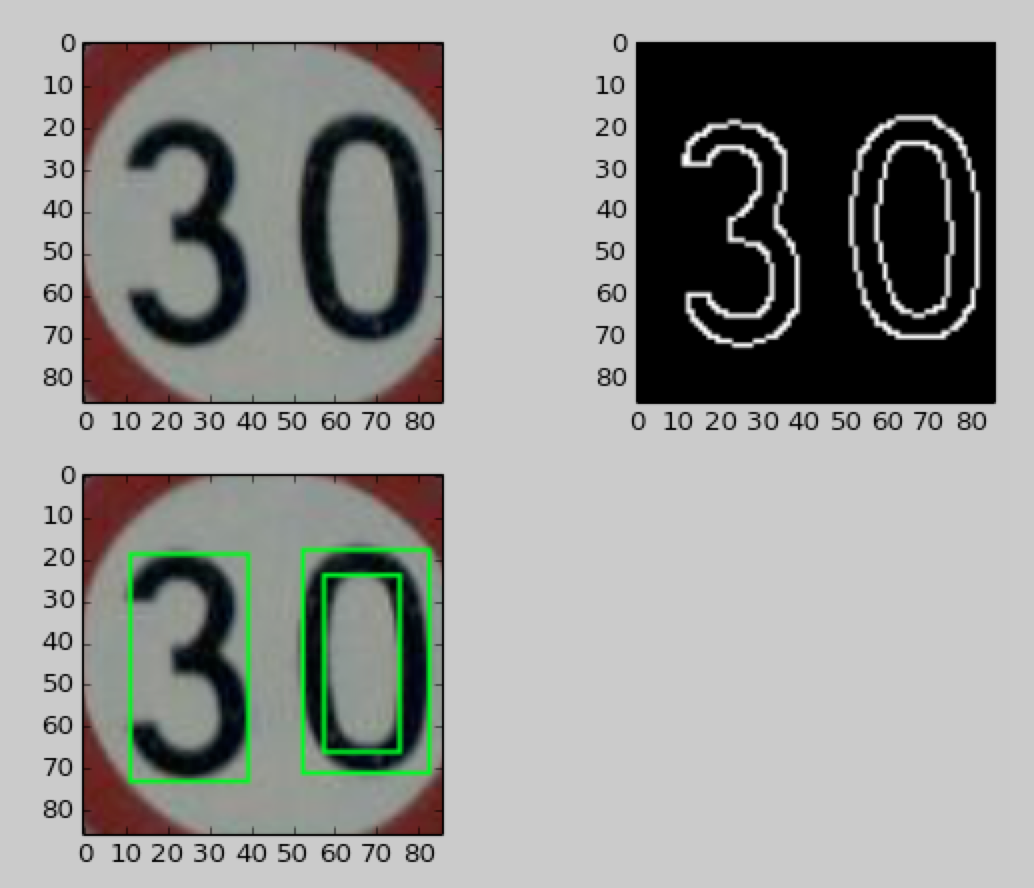
If you want to look at the source code of the part 1 please look at GitHub Repo.